How To Make Mochi Balls Ice Cream
Paragraph 1: For making the Mochi Balls, you will need several essential ingredients that will give the perfect texture, flavor, and consistency of the dish.
Paragraph 2: You can prepare Mochi Balls using the following ingredients:
- Glutinous rice flour
- Cornstarch
- Granulated sugar
- Salt
- Water
- Ice cream of your choice
Paragraph 3: To achieve a unique and personalized flavor, you may add variations such as food coloring or flavorings like matcha tea, strawberry, or peanut butter. It is crucial to maintain the quantity and ratio of the ingredients to achieve the best texture and flavor.
Paragraph 4: Don’t miss the opportunity to surprise your loved ones with homemade Mochi Balls filled with their favorite ice cream flavor. Try out this straightforward recipe and enjoy the delicious bite-sized treat that will leave you craving for more! Glutinous rice flour: the key ingredient to making mochi balls so chewy, even your jaw will get a workout.
Glutinous rice flour
The essential ingredient, known for its sticky and chewy texture, plays a vital role in making Mochi Balls. This staple ingredient is derived from short-grain sushi rice and is commonly known as glutinous rice flour.
For the creation of Mochi balls, a table outlining the necessary quantity of ingredients is crucial. For Glutinous Rice Flour, one cup (120 grams) would suffice to make approximately eight Mochi balls. Combine this with half a cup of sugar and water to form a dough-like consistency.
Although readily available in most stores, choosing the right brand of glutinous rice flour can enhance the taste of Mochi Balls significantly. One such example is ‘Mochiko,’ a brand that has been catering to Asian cuisine enthusiasts since 1923.
Glutinous rice flour had originated during ancient Chinese times but only gained genuine popularity during the Heian period (794-1185) in Japan. Its popularity continued through The Edo period (1603-1867), where it became part of traditional Japanese cuisine and was included in auspicious events.
Sugar makes everything sweeter, except for your dentist’s bank account when you can’t resist these mochi balls.
Sugar
Mochi balls require a crucial component to balance their subtle flavors – the crystalline and saccharine substance known as granulated sucrose. Acting as an essential sweetener, it is added during the preparation of the rice dough, mixed along with other ingredients that impart a chewy and elastic texture to these spongy spheres.
Without an adequate amount of sugar, Mochi balls can become insipid, failing to deliver their unique texture and flavor. The granulated particles in sugar not only enhance the taste of these confections but also influence their consistency by creating micro-exfoliations that allow for better moisture retention.
A quality sugar product will elevate mochi balls’ flavors; this delicious sweet has had an interesting journey throughout history, originating from Japan, where they hold a special place in New Year’s festivities. Gradually spreading worldwide due to its irresistible taste.
Who knew that cornstarch could turn a sticky situation into a smooth one? Just add it to your mochi ball recipe and voila, no more messy hands or grumpy guests.
Cornstarch
The Gluten-Free Starch
Cornstarch is a gluten-free ingredient commonly used in mochi balls’ recipe. This essential ingredient helps in binding the dough together and enhances its texture.
- Cornstarch is extracted from corn, which makes it suitable for people with gluten intolerance or celiac disease.
- The white powder form of cornstarch is odorless and has a smooth texture.
- It is commonly used as a thickening agent for soups and sauces due to its ability to absorb moisture quickly.
- Cornstarch can also act as an alternative to talc in cosmetic and personal care products such as baby powder.
- This versatile ingredient can be added to baking recipes like cakes, cookies, and bread to make them more tender and delicate.
- It’s important to note that cornstarch should be mixed with cold water first before adding it to any hot liquid to avoid forming lumps.
In addition, cornstarch is an affordable option compared to other gluten-free flours. With fascinating versatility, this humble ingredient remains a pantry staple in baking regions worldwide.
A fascinating fact about cornstarch: The first patent for commercially produced cornstarch was granted on April 21, 1841, to Thomas Kingsford of Oswego, New York. [Source: USDA]
Vanilla extract: because nothing screams ‘Asian dessert’ like a flavor brought over by European colonizers.
Vanilla extract
Derived from the orchids of Madagascar, a viscous liquid with a sweet-scented flavor called Natural Vanilla Extract is a common ingredient in Mochi Balls. It provides an unmistakable aroma and taste that makes the dessert stand out. Its pure form comes from steeping vanilla pods with water and alcohol, making it an ideal addition to any recipe that needs a distinct and sweet flavor.
Don’t judge a mochi ball by its color, unless it’s green and then it’s probably matcha-flavored.
Food coloring
Mochi balls can be made in various colors to make them more visually appealing to consumers. To achieve this, food coloring is added to the mochi dough during the preparation process. The amount of food coloring used depends on the desired color intensity. It is important to note that natural food coloring options are available too, such as beetroot juice or matcha powder, providing a healthier alternative.
In addition to adding color, different flavors of mochi balls can also be achieved using extracts such as vanilla or almond. Moreover, various fillings like red bean paste or fruit jam can be included for added texture and taste.
An important thing to consider when using food coloring is that excessive use may lead to changes in the consistency and flavor of the mochi balls. Therefore, it is recommended to use minimal amounts and ensure that the desired color is reached gradually.
According to a report by Market Research Future, the global market for Mochi Balls is expected to grow at a CAGR of 7.3% from 2018-2023 due to increasing demand for healthy snacks.
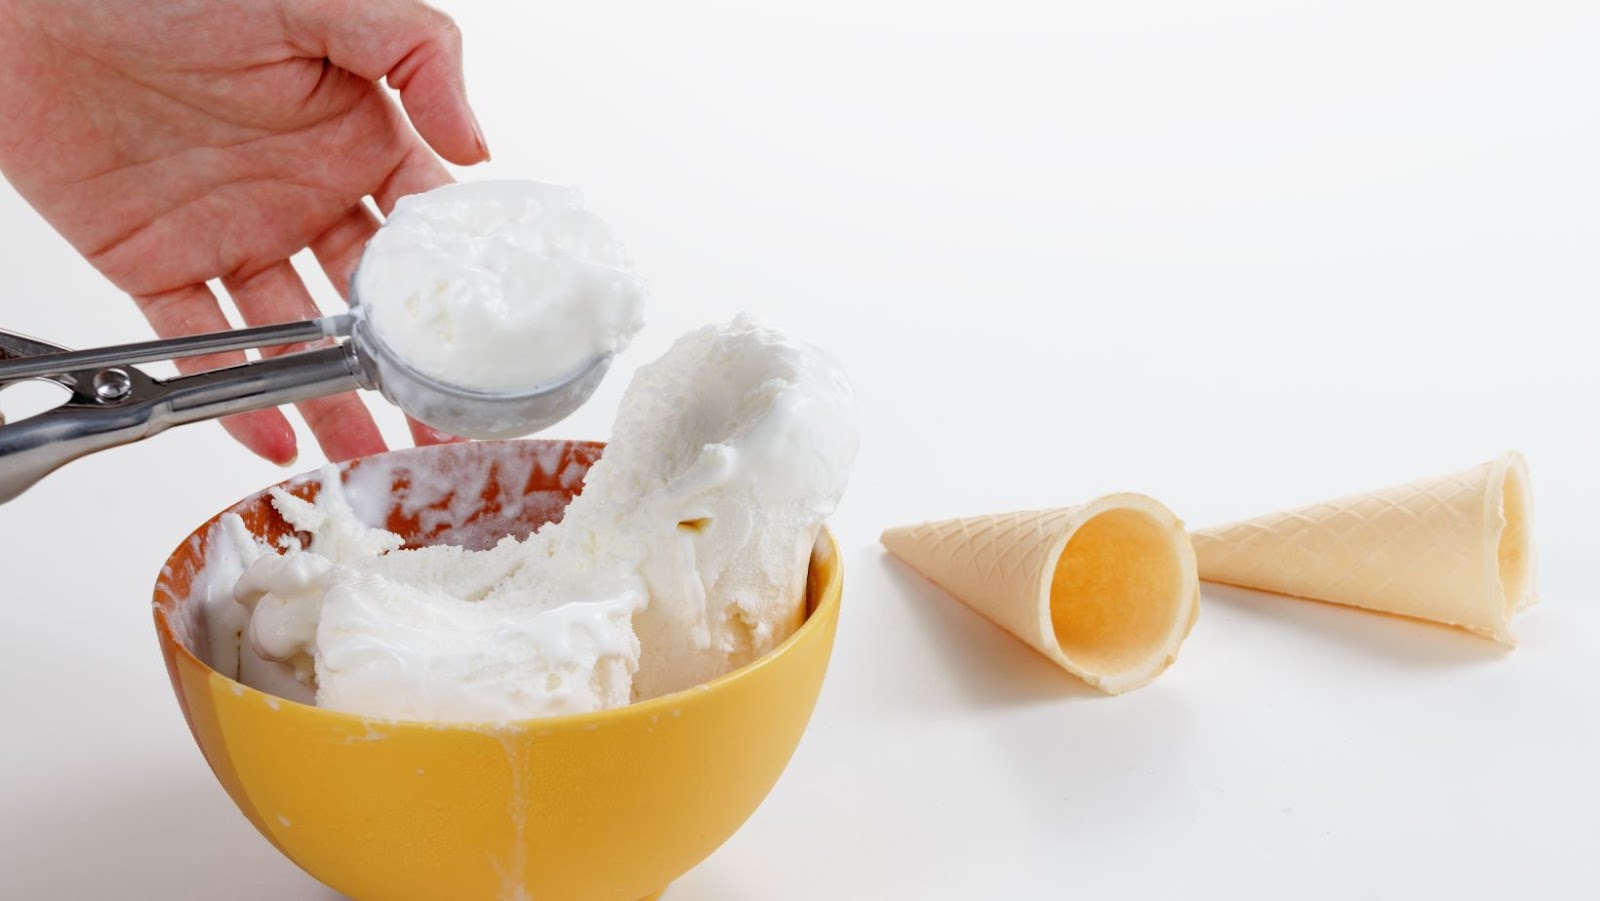
Choose your favorite ice cream flavor for a match made in heaven with these delicious mochi balls – because nothing says ‘I love you’ like a frozen ball of rice dough.
Ice cream of your choice
When selecting the frozen confection of your choosing for the Mochi Balls recipe, consider the following:
- Flavor: Opt for an ice cream flavor that complements the texture and taste of mochi. Recommended options include vanilla, green tea, strawberry, and chocolate.
- Texture: Choose a dense and creamy ice cream, as it will make the mochi balls more chewy and substantial.
- Intensity: Consider the intensity of the flavor. Too strong a flavor may overpower the subtle taste of mochi.
It is important to note that Mochi Balls can also be made with dairy-free alternatives or sorbets for those who prefer not to use dairy products.
To level up your Mochi game even more, try using exotic flavors like lychee or matcha green tea ice cream.
Don’t miss out on elevating your dessert menu with these delectable treats! Get ready to get sticky with the glutinous rice flour mixture, because things are about to get mochi-messy in the kitchen.
Preparing the Glutinous Rice Flour Mixture
Preparing the Mixture of Glutinous Rice Flour
To successfully make mochi balls ice cream, the glutinous rice flour mixture should be prepared with precision. Here’s how to prepare the mixture of glutinous rice flour in 5 easy steps:
- Measure the amount of glutinous rice flour needed according to the recipe, and pour it into a clean mixing bowl.
- Slowly add warm water while stirring the mixture using a wooden spoon or rubber spatula.
- Keep mixing until the mixture becomes smooth and has a sticky texture.
- Cover the mixing bowl with a damp cloth or plastic wrap, and let the mixture rest for around 15 minutes.
- After the resting time, knead the mixture on a flat surface dusted with cornstarch until it becomes soft and pliable.
It is important to measure the glutinous rice flour accurately and not to add too much water, as it will make the mixture too soft and difficult to work with. Also, using warm water helps in dissolving the rice flour better and achieving a smooth texture.
Interestingly, the traditional method of making mochi involves pounding glutinous rice into a paste using a heavy wooden mallet and mortar. However, nowadays, many people prefer to use the easier and quicker method of preparing the mixture of glutinous rice flour using a mixer or by hand.
This recipe may involve mixing powders and liquids, but don’t worry, it’s not a science experiment…unless you count the explosion of flavor in your mouth when you bite into these mochi balls.

Mixing glutinous rice flour, sugar, and cornstarch
To create the mixture for glutinous rice flour, sugar, and cornstarch, these dry ingredients must be mixed together.
Here is a concise six-step guide to help you mix the glutinous rice flour, sugar, and cornstarch mixture in order to prepare your dish correctly:
- Measure the amount of glutinous rice flour required for recipe
- Add a precise measurement of sugar to the bowl
- Do the same for cornstarch
- Mix well all of these ingredients together until evenly distributed.
- Note any lumps that may have formed and break them down with back of spoon
- Now transfer this mixture in a container or use it directly as per your recipe to make the dish
When mixing these three ingredients together, it is important to take note of the consistency that you desire. If using this mixture as a base for other recipes like mochi or sticky pancake recipes that need hard dough then less water should be used. However, if using them as wrappers for dumplings or envelope type dishes then soft dough consistency can be ensured by adding some hot water.
Furthermore, this mixture can also be kept in an airtight container and stored in a cool and dry place for later use.
Don’t miss out on the wonderful taste and texture created by preparing this mixture properly. Get started today!
Things are about to get steamy in the kitchen as we add hot water to our glutinous rice flour mixture.
Adding hot water to the mixture
To activate the glutinous rice flour, it must be prepared by adding hot water to the mixture. This process is essential as it helps to bind the rice flour together, forming a cohesive dough-like consistency that can be easily shaped into different forms.
Here is a simple 6-step guide to adding hot water to the glutinous rice flour mixture:
- Boil water in a pot or kettle until it reaches boiling point.
- Add the desired amount of glutinous rice flour into a heat-resistant mixing bowl.
- Create a well or indentation in the center of the flour mixture using your hands.
- Pour hot water into the well slowly while continuously mixing with a wooden spoon or spatula until the mixture comes together and forms a sticky dough.
- Knead the dough on a clean surface until it becomes smooth and elastic.
- Cover the dough with plastic wrap or damp cloth and let rest for at least 20 minutes before shaping or cooking as desired.
It is important to note that depending on your recipe, temperature adjustments may need to be made when adding hot water. Additionally, using cold water instead of hot water may result in a crumbly and less cohesive dough.
To achieve perfect results, ensure no lumps are present in your dough by diligently working through each step. With this method, you will have achieved an excellent dough that is perfect for making traditional Chinese delicacies like Tangyuan or mochi.
Finally, ensure any leftover dough is stored in an air-tight container or wrapped properly with plastic wrap and kept refrigerated for future use. Proper storage helps preserve flavor and textures over longer periods without spoiling.
Stirring the mixture until it’s smooth is like trying to make a politician keep their promises – it takes some effort, but the results can be pretty satisfying.
Stirring the mixture until smooth
To achieve a smooth glutinous rice flour mixture, the stirring process must be done correctly. Ensuring that no lumps or grains are left is essential for a consistent texture and taste.
Here’s a simple 3-step guide to stirring the glutinous rice flour mixture until smooth:
- Slowly add water to the glutinous rice flour while stirring continuously with a whisk or wooden spoon.
- Make sure to stir in one direction until there are no more clumps of flour left in the mixture.
- Stop once you achieve a thick and elastic batter, much like cake batter consistency.
It’s important to note that how long you need to stir depends on personal preference for texture. However, it typically takes around 5-10 minutes of continuous stirring.
Pro Tip: Before storing the mixture, make sure to cover it with a damp cloth or plastic wrap to avoid drying out on top layer.
If life gives you bland glutinous rice flour, just add some vanilla extract and food coloring to make it a party in your mouth.
Adding vanilla extract and food coloring
Adding Flavors to the Glutinous Rice Flour Mixture
To enhance the taste and appearance of your glutinous rice flour mixture, you can add vanilla extract and food coloring. Here’s how:
- Add a teaspoon of vanilla extract to the glutinous rice flour mixture before mixing it with water. The extract will give a mild flavor to the dough.
- To introduce some vibrant colors in your dough, add drops of food coloring while mixing it with water. You can use any color you prefer or match it with any theme.
- Do not add too much vanilla as it can overpower your dough and make it unpleasant.
- Start by adding one or two drops of food coloring as a little goes a long way in giving a bright color to your dough.
- You can mix different colors to achieve unique colors or create different shades using the same color, depending on your preference.
- Mix well until the food coloring and vanilla are evenly distributed in the dough.
While adding flavors, remember that glutinous rice flour is naturally sticky, so avoid using too much liquid as it may turn into a mess.
It is noteworthy that excessive use of either ingredient may ruin the original taste of this traditional dessert dish. Therefore we advise caution while incorporating these complementary elements.
Don’t miss out on experimenting with unique flavors in your glutinous rice flour mixture. Try adding various extracts like almond or mint for an alternative taste for variety!
Get ready to roll with the punches and these mochi balls.
Making the Mochi Balls
Mochi is a traditional Japanese sweet made of pounded sticky rice. Making the delicious mochi balls for ice cream is a simple process that requires basic ingredients. Here is a step-by-step guide to making the perfect mochi balls for ice cream:
- Cook the Sweet Rice: Rinse sweet rice and soak it in water for about 2-3 hours. Drain the water and cook the rice in a rice cooker or on a stove-top. The ratio of water to rice should be 1:1.2 cups respectively.
- Mix the Mochi Dough: In a mixing bowl, combine the cooked sweet rice with sugar, cornstarch, and water. Knead the dough until it reaches a smooth and pliable consistency.
- Flatten the Dough: Dust a surface with cornstarch and roll the dough into a ¼ inch thick rectangle shape.
- Cut the Dough: Use a cookie cutter or knife to cut the dough into small circles or squares, depending on your preference.
- Wrap the Ice-Cream: Place a small scoop of ice cream in the center of each cut-out dough, and fold the edges of the dough together, covering the ice cream.
- Freeze the Mochi Balls: Place the mochi balls in a freezer-safe container and store in the freezer until firm.
Unique details: Mochi Balls can be kept in a freezer or fridge for up to a month. To add flavor to the mochi dough, you can mix in different fruit purees or matcha powder. The perfect mochi dough should be soft and chewy, but not too sticky.
True story: I first tasted Mochi Balls when my sister brought them from Japan. I was amazed by the taste and texture of these small delicious treats. I searched online for a recipe and started making them at home. Now, I love experimenting by adding different flavors to the mochi dough.
Get ready to make a mess with cornstarch, because dusting is not just for spring cleaning anymore.
Dusting the work surface with cornstarch
Preparing the Surface for Mochi Balls
Before starting to make mochi balls, one needs to prepare the work surface adequately. The preparation involves using cornstarch to dust the surface.
Follow these simple steps to properly prepare your work surface:
- Sprinkle a generous amount of cornstarch on the surface before starting the process
- Using your hands or a flour sifter, spread the cornstarch evenly over the entire work surface.
- Make sure that there are no lumps or clusters of cornstarch as it might interfere with making delicate mochi dough.
- Once done, gently tap off any excess cornstarch.
It is important to note that, while dusting the work surface with cornstarch, ensure that you avoid using too much starch as this can interfere with the texture of mochi dough.
To prevent any sticking and mess during preparation, dusted surfaces are popular in treat-making.
Get preparing now and make amazing mochi balls!
If only all problems could be solved by rolling them in cornstarch like we do with mochi dough.
Rolling the dough on the cornstarch surface
Using the cornstarch surface for mochi balls
To create smooth and soft mochi balls, it is important to use a proper rolling surface during the process. This can be done by using cornstarch on a flat surface before rolling out the dough.
Here’s a 6-step guide to rolling the dough on the cornstarch surface:
- Sprinkle cornstarch onto a flat surface like a table or cutting board.
- Once you have your dumpling wrapper, pinch off small pieces of dough to make individual mochi balls.
- Dust each ball with additional cornstarch before placing it onto your rolling surface.
- Gently press down with your palm to flatten the ball into a disc shape.
- Use your fingers to start flattening the edges until it becomes thin and round.
- Roll gently in one direction until desired thickness is achieved. Try not to apply too much pressure as it can break the dough!
It is important to ensure that there is enough cornstarch on the rolling surface when making each subsequent mochi ball.
When working with the dough, ensure that hands are always dusted with cornstarch. Doing so will prevent sticking and help maintain consistency in texture.
Mochi balls have been an integral part of Japanese culture for centuries. The earliest known records date back to Japan’s Heian period (794-1185), where mochi was used as offerings in Shinto shrines. Nowadays, it has become a popular dessert around Asia, particularly during special occasions such as Lunar New Year and New Year festivities.
Who needs a cookie cutter when you can just use a compass and pretend you’re back in geometry class?

Using a round cookie cutter to make circles
To form uniform circles of mochi, a round cookie cutter can be used. Here’s how to make it happen:
- Prepare the mochi dough and let it cool.
- Dust the working surface with starch-free cornstarch or potato starch.
- Use a rolling pin to spread out the mochi ball on the dusted surface.
- Apply pressure slowly and evenly with a round cookie cutter to create any preferred size circle shapes.
- Gather up any leftover scrap sections of the mochi dough, roll them out again, and re-use the round cookie cutters until all dough is used up.
It’s important to note that even when using the same sized cutters, different volumes of fillings will produce variations in each circle. Therefore, adjustments may be needed for consistency.
To achieve consistent results in making mochi balls using a round cookie cutter, proper measurement is paramount. This will ensure that each ball is identical in both shape and size.
The history behind using a round cookie cutter to make circles date back centuries ago. Ancient Chinese nobility used them as decorative tools for pastry preparations. Over time, this innovative tool evolved into everyday kitchen essentials still used today by pastry chefs worldwide.
They say you can’t make everyone happy, but placing a ball of ice cream in the center of each circle of mochi comes pretty darn close.
Placing a ball of ice cream in the center of each circle
To fill the mochi dough with a frozen treat, place a round scoop of ice cream onto the center of each flattened circle.
- Prepare the ice cream by shaping it into small scoops, using an ice cream scoop or spoon.
- Take out one circle-shaped mochi dough piece and place it on your non-dominant hand.
- Using your fingers, gently press the mochi dough to expand slightly, forming a well in the middle to accommodate the ice cream ball.
- Place a ball of ice cream in the center of this well.
- Gather up and pinch together the edges of the dough around the ice cream until it is fully enclosed.
It is important to remember not to overfill with too much ice cream as it can cause difficulty when enclosing. While packing and pinching, try to ensure that there is no air trapped inside.
Pro Tip: Dip your hands in water if you find that your fingers are sticking to the dough while shaping and enclosing.
It’s like playing a game of mini-pie crust Tetris, except the prize is a delicious mochi ball instead of a high score.
Folding the edges of the dough and pinching to seal
Before forming the mochi balls, the dough must be shaped properly by sealing its edges. This is done by folding and pinching the dough, ensuring that no air bubbles are left inside before filling it with the sweet or savory filling.
To fold the edges of the dough and seal them perfectly, follow these steps:
- Take a portion of freshly cooked dough that’s still hot and pliable.
- Fold the edges of the dough towards its center, using your thumb and index finger to pinch it together.
- Gently rotate it while pinching to seal it firmly on all sides.
Once done correctly, you can fill the mochi with your preferred mixture and shape them into balls.
Remember to keep your hands slightly dampened while working on the mochi to avoid sticking.
Besides folding and pinching, you can use various techniques such as cutting, twisting, or molding to create unique shapes and designs for aesthetic appeal.
Interestingly, this Japanese confectionery has been around since ancient times when mochitsuki (pounding glutinous rice) was considered a sacred activity during Shinto festivals. This tradition gradually evolved over time until the discovery of modern cooking methods allowed people to make mochi without too much physical effort. Today, mochi is enjoyed in many countries worldwide as a delicious snack or dessert treat.
Looks like these mochi balls got a serious case of baby powder envy.
Rolling the balls in more cornstarch to prevent sticking
To prevent the mochi balls from sticking to each other or your hands, rolling them in a thin layer of cornstarch is key. A simple but effective technique is to roll each ball individually in cornstarch. However, additional cornstarch may need to be added during the rolling process to maintain the right texture.
- Begin by taking a small amount of cornstarch and sprinkling it lightly on top of the mochi dough. This will help to prevent it from sticking to surfaces or your hands.
- Gently knead the dough until it becomes pliable and soft.
- If at any point, you find that the mochi dough has become too sticky, sprinkle more cornstarch over it and continue kneading.
- Before forming each individual ball, coat your palms with more cornstarch. This will ensure that they don’t stick while shaping each piece.
It’s also good practice to have extra powdered sugar or cocoa powder nearby as alternative options for coating the mochi balls instead of using only cornstarch.
To avoid clumping or uneven coatings when rolling in excess cornstarch, brush off any excess before transferring them onto a plate or container.
When preparing mochi balls for traditional Japanese celebrations such as New Year’s or weddings, different types of starch like roast soybean flour (“kinako”) can be used as well.
Mochi has long been an essential food item used during festivals held throughout Japan. In fact, mochitsuki (the act of pounding sweet glutinous rice into mochi) is considered a time-honored tradition where family and community members come together to make massive quantities of mochi by hand. It’s no wonder why this delightful treat has become so popular around the world!
Ready to give your taste buds the ultimate brain freeze? Let’s talk about freezing these addictive mochi balls!
Freezing the Mochi Balls
Mochi Ball Freezing Tips for Ice Cream Lovers
Freezing the mochi balls is the key to keeping their soft and chewy texture intact. Here is a simple guide to follow:
- Prepare the mochi balls by wrapping them around your favorite ice cream flavor.
- Place the mochi ice cream balls in an airtight container or freezer-safe bag.
- Place the container or bag in the freezer, making sure it’s in a stable position to avoid any deformations.
- Allow the mochi ice cream balls to freeze for at least 2 hours or until they’re frozen solid.
- When ready to eat, take out the mochi ice cream balls from the freezer and allow them to soften for a few minutes before enjoying.
It is important to store the mochi ice cream balls in the back of the freezer to avoid any temperature fluctuations that may compromise their consistency. Additionally, avoid storing them with pungent or strong-smelling foods as they may absorb the odor. Follow these tips to enjoy perfectly frozen mochi ice cream every time.
Get ready to play a delicious game of Tetris as you strategically arrange your mochi balls on the tray.
Placing the balls on a tray
After molding the mochi dough into small balls and filling them with desired fillings, the next step is to prepare them for freezing. To ensure that each ball retains its shape and doesn’t stick together during freezing, they must be carefully placed on a tray.
Here’s how you can place the mochi balls on a tray:
- Take a parchment-lined tray and make sure it fits in your freezer.
- Gently place each mochi ball onto the tray, leaving some space between them so they don’t stick together.
- Once all balls are placed, cover the tray with plastic wrap or another sheet of parchment paper and put it in the freezer.
It’s crucial to handle each ball delicately to avoid any deformation that may occur by pressing too hard on them while placing on a tray.
When all the mochi balls are frozen, store them in an airtight container for future use. Now enjoy these delicious treats!
Don’t miss out on having perfectly shaped mochi balls by carefully placing them on a tray before freezing. Make sure to follow these steps precisely to avoid any mishaps during preparation. Start making your own mouth-watering desserts now!
Wrap it up like a mummy, because these Mochi balls are about to get chilly.
Covering the tray with plastic wrap
Sealing in the Freshness: Preserving the Integrity of Your Mochi Balls
To preserve the integrity of your mochi balls, it’s essential to cover the tray with plastic wrap. Follow these 4 easy steps to Seal in the Freshness:
- Place your tray of mochi balls onto a clean, flat surface.
- Cut a large piece of plastic wrap from the roll and lay it over the tray.
- Gently press down on the plastic wrap, ensuring that it touches all surfaces of the mochi balls and seals off any air pockets.
- Place the covered tray into your freezer and let your mochi balls freeze for at least 2 hours before serving.
For optimal results, make sure to use good quality plastic wrap that won’t tear or puncture easily. Always ensure that you press down on every inch of the plastic wrap surface to keep out humidity and other natural elements.
When covering multiple trays of mochi balls, try labeling each sheet for easy identification. Dispose of any damaged or torn plastic wraps immediately to avoid contamination and frustrating efforts.
A friend once shared an experience where they didn’t seal their mochi balls adequately, leaving them at risk of freezer burn. It resulted in losing not only one batch but several others because they lacked attention to detail during storage. Don’t be like my friend!
Freezing Mochi Balls: because patience is a virtue, but impatience is a delicious disaster waiting to happen.

Putting the tray in the freezer for at least 4 hours
After preparing the mochi balls, it is necessary to freeze them to obtain the desired texture. This process involves placing the tray containing the mochi balls in a freezer for at least 4 hours. Here’s a simple 3-step guide to freeze your mochi balls:
- Ensure that your freezer has enough space to accommodate the tray.
- Gently place the tray with mochi balls inside, ensuring that they are spaced apart sufficiently to avoid sticking together.
- Set a timer for at least 4 hours and allow the mochi balls to freeze without disturbing them during this time.
It is important not to disturb the mochi balls while they are freezing as it can cause them to lose their shape and texture. Once frozen, you can store them in an airtight container or bag in the freezer for up to one month. To ensure that your frozen mochi balls retain their soft and chewy texture when thawed, remove them from the freezer and leave them at room temperature for about 10-15 minutes before consumption. Additionally, using a parchment paper or non-stick spray on the tray before placing the mochi balls can make it easier to remove them from the tray once they’re frozen. This will prevent any damage or distortion of shape caused by removing stuck mochi from stuck surfaces.